Cutting or spring cutting of houseplants and their propagation!

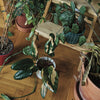
Spring is in full bloom, so it's time to take out the scissors and knives to turn our (winter-devastated or wild-faced) green jungle into a cozy kingdom again.
We will describe and explain in detail why, when and how to cut and cut roomies in this article, so read on!
Why cut plants?
Every housekeeper is different, just like every grower. For this reason, things may look different in your home after winter. Some plants may be withered, have fallen leaves, withered parts or, on the contrary, may have grown into strange shapes, awkwardly stretched behind the fading light. Some species (for example, candlesticks or philodendrons, scindapsus) could disappoint their owners with long gaps between the next row of leaves or even bare stems without them at all.
If one of your rooms matches the description above, then that spring haircut needs like salt! So why do we cut and trim?
There are many reasons, but among the most common are the following:
A big, rich maid
Would you like a flowerpot filled to the brim with your favorite plant? Cut! By cutting the plant, we stress it to create a new growth point and thus gradually branch out. When we let the cuttings take root (and you will learn how to do this in this article), we can transplant them back to the mother plant and thereby thicken it with another growing shoot.
The roommate is outgrowing or we want more roommates!
By taking cuttings, we can relieve the mother plant, which will have more energy left for its own growth, and we can also grow our own plant babies from the rooted cuttings. We can keep them or give them to our surroundings.
The maid is not doing well, she is dry, yellow... she is simply unwatchable.
The sad reality is that not all maids will fill us with happiness and we will have them forever. However, yellow or dry parts don't necessarily mean the end and the bin (or a compost heap).
By removing these dying parts of the plant, we will primarily help ourselves (the growers), because then the plants will not remind us of that sad reality. At the same time, we also protect the other maids, because it is the dying parts that attract all kinds of pests (and that's just a nightmare)!
Sharing the love
Propagation is a fantastic way to share your passion with others, grow whole new plants and share them with other growers. You can exchange your cuttings on so-called swaps. We ourselves organize the event Give me a cut, which is attended by many enthusiastic growers, beginners and advanced. This year's first plant swap will take place on April 13, 2024 from 1:00 p.m. in front of our store at: Sokolovská 377/141, Prague 8.

When to propagate plants?
We can cut houseplants practically at any time. However, even here there are a few factors that we should be aware of before making the final "snap".
Too much stress is bad for everyone
Keep in mind that every procedure we perform on a maid (for whatever loving reason) means stress for her. Transplantation - stress. Relocation and change of conditions - stress. And cutting? – also stress. Even though nature is amazing and can deal with anything incomprehensibly, it would be reckless and pointless to test it like this. Let's show our home greens a kindness and dose them with stress gradually - perhaps with intervals of several (weekly) days.
TIP: We can recognize a plant that is under stress, for example, by the changed leaves (withered, shriveled) or by the fact that it stops growing. Therefore, if your room plant is actively growing, it is more likely that you will not harm it by cutting.
Winter
The winter period is actually one giant stress and if you want our plant to cope with it as best as possible, remember the rule three times NO: don't transplant, don't fertilize and especially don't cut! In general, it can be said that the most suitable time for a proper haircut is in the fall (we lighten the houseplants for the winter and the cuttings will take root by spring) or in the spring.
What is needed to propagate plants?
Some tools are necessary and some are just nice additions to your growing needs.Plant
Obviously you will need a plant to propagate! So choose a healthy plant to use - although many plants can be propagated, some are more successful than others, so the choice of plant will depend on this, as will the method of propagation. We do not recommend propagating baby plants, they are still weak and young. The older the plant, the more mature it will be and the more you will get from it.
Selected tool
Sterilized shears or pruning shears - clean tools (disinfected) will reduce the risk of disease or pest transmission between plants.

Medium for growing in pots
To begin with, multiply the plants in water, then you can try other media such as peat moss , vermiculite, expanded clay or perlite . You can also season in the substrate, but in that case it is necessary to monitor the humidity in the substrate more often. It should never dry out. It will all depend on your preference or the plant you have chosen to propagate, but more on that later.
Flower pots
Prepare several pots or shallow plastic trays (with drainage holes) in which to plant the new plants. Generally, your cuttings don't have roots yet, so you don't need a lot of substrate to start with (this also reduces the chance of rot). If you are putting the cuttings in water, have a glass mug or jar handy. Or perhaps our cutting station .
Lignohumate
A preparation that will help faster root growth. You can also buy it at our store. 
Other materials that are good to have on hand are: a watering can , a mat for a flower pot, gloves, a sprayer to mist the cuttings as they grow, and rainwater or standing water (water that you filled from the tap and left to stand overnight) for pouring schnitzel in a glass.
What are the most common methods of cutting plants?

The easiest method of cutting and propagating houseplants is through their rootstocks, which have aerial roots. In the pictures, you can see what the aerial roots of popular and frequent houseplants look like: pothos, philodendron, monstera and candlestick.

Monstera Adansonii 'Monkey mask' and visible aerial roots.

Variegated candlestick (ceropegia woodi variegata) and its aerial roots.
One more time and a closer look at the neon pothos cutting:

The pinion itself is the most essential part for the propagation of these plants - and thus differs from, for example, peperomias (pepper plants), which reproduce without them. The rootstock contains both the potential for the growth of new roots and the potential for the growth of a completely new plant. Logically, without a peg, we won't have roots or a plant - and that's what it's all about. A new plant will never grow from a leaf without a root (for example, with ficuses, the leaf itself can take root, but it will never continue to grow).
We always cut the plant about 1-2 cm below the stem from which we want to have a new plant.

The collar becomes active as soon as it comes into contact with moisture or water. Within a few weeks, roots will begin to appear, thanks to which the cutting will get the energy to start growing.
How the plant will continue to grow depends on what type of cutting we have:
Top cutting
This is a cutting that contains a peg already with an active growth point, as we can see in the picture. A rooted cutting planted in this way continues to grow - this is the fastest propagation option .

Stem cutting (stem cutting)
This cutting contains a spigot without an active growing point. It is practically a cutting from the middle part of the plant. It contains only a peg from which the roots will grow and usually one leaf that creates energy for the cutting. This is a slower version of multiplication , due to the fact that the potential growth point in the peg is only activated - over time. Take a good look at the leaf during this time, because once a new plant grows from the peg, that leaf from the original plant will likely die. Also, be prepared that the stem cutting plant tends to be smaller to begin with - it takes a while for a houseplant to grow strong enough to have the same size leaves as its mother.


This is how we label a cutlet that is bare - without leaves. You might think that it is therefore useless, but it is not true. If your cutting contains a peg, it can still grow into a new plant. But it is the slowest method of all. It must be observed frequently in water (or in another moist medium) to ensure that it does not rot. Because it does not contain a leaf that would provide it with the necessary energy to grow, it grows very slowly and, just like from a stem cutting, it will become a tiny, small plant that will grow stronger and stronger over time. But the beauty is worth waiting for, isn't it?
Leaf cuttings - the photo shows a spice leaf of Peperomia raindrop
Remove a healthy leaf from the plant. For some plants, you can use the whole leaf, for others only a part. Prepare a container with high-quality, well-permeable soil. Place the leaf (or part of a leaf) on the surface of the soil. For some plants, such as succulents, it is a good idea to let the leaf dry for a few days before placing it on the soil to prevent rotting. Keep the soil slightly moist. After some time, small roots and new plants should start growing on the cutting.
Example: Sedum burrito, Peperomia argyreia
Propagation using leaf cuttings: This method of propagation is a bit more demanding, but allows you to get more new plants from a single leaf. The Sansevieria leaf is first cut with a sharp knife or scissors into smaller parts, each about 5-10 cm long. It is important to remember which end was up and which was down, as the cutting must be planted in the original direction of growth. The cuttings are then left in the air for a few days to allow the cut to heal before being planted cut side down in a moist succulent substrate. After a few weeks, the cuttings should form roots and begin to grow new leaves.
By division - in the photo we divide Spathiphyllum Alana
Propagation of plants by division is a simple and effective way to create more new ones from one plant. This method is often used for climbing plants or plants with rhizomes, such as ferns, orchids, or many types of succulents.
Below is the basic procedure: First, carefully remove the plant from the pot. If the plant is firmly rooted, the pot may need to be gently pressed to loosen the plant. Gently clean the roots of excess soil. This will allow you to better see the structure of the roots and rhizomes. Divide the plant into smaller parts so that each has a few healthy leaves and enough roots. You can do this by hand or with the help of a sharp knife. Plant the newly created plants in pots with a quality substrate, the pot must be just enough so that the newly planted plant can take root happily. If the substrate was dry before dividing the plants, it is time to water it after planting the plants.
Place the plants in a bright place so that the plant takes root better.
Example: Zamioculcas zamiifolia , Sanseviera laurentii
Offshoots
A scion is usually a long, thin shoot that grows from the base of the parent plant or from the stem of the plant. Some plants, such as some types of sansevieria or peperomia, produce offshoots naturally.
The scion is cut from the mother plant using sharp and clean scissors or a knife. It is important to ensure that tools are clean to prevent potential infections from being introduced to the plant. On the scion, any leaves near the bottom end should be removed. This will improve the chances of successful rooting, as the plant can focus its energy on root formation instead of maintaining leaves.
Propagation by cuttings: This method of propagation is the easiest and fastest. Sansevieria produces rhizomes, small plants that grow from the base of the parent plant. These rhizomes can be easily separated with a sharp knife or scissors, ideally sterilized to avoid any infections. After separation, the new plant should be left in the air for a few days to allow the cut to heal, and then it can be planted in the succulent substrate.
Examples: Sansevieria moonshine , Pilea peperomiodes
Outcrops
Shoots are the long, growing stems that some types of plants produce, including many houseplants. These processes often grow from the base of the plant and point outwards or downwards, depending on the type of plant. Small plants often appear at the end of these projections.
Propagation of creeper houseplants usually consists of separating these small plants from the parent plant and planting them in soil or water to develop into separate plants. Plants at the end of spurs often have small roots of their own, allowing them to establish quickly and grow on their own.
Seeds
You can get seeds from your own plant if it is flowering and producing seeds, or you can buy them. If you are collecting seeds from your own plant, wait for the fruit to ripen and open before carefully removing the seeds.
Place the seeds on a soaked cotton ball and let them germinate. Place the seed container in bright, but not direct, light. Once the seeds germinate, they will need more light. Wait until the seedlings develop their first true leaves and their stem has primordial roots. You can then transplant them into individual pots.
Air layering
It is a plant propagation technique that is mainly used with woody plants, but is also applicable to some houseplants. This technique consists in inducing root growth directly on the trunk or branch of the plant while it is still attached to the mother plant. After the roots have formed, the new plant is separated and immediately planted separately.
We choose a healthy shoot or a branch on the plant that we want to reproduce. We make a small cut or remove the bark about half way through the shoot so that the white woody interior can be seen. We wrap the wound in moist moss/peat or other substrate and cover this with transparent film. This creates a small greenhouse effect that maintains high humidity and promotes rooting.
After a few weeks, roots should appear. As soon as the root system is strong enough, the branch is cut from the mother plant and planted in the substrate.
Air layering is much more complicated than, for example, propagation using cuttings, but it has one big advantage. Because the new plant is attached to the mother plant at all times, it receives nutrients and water from it and is much more likely to survive and develop a strong root system.

We hope that thanks to our article, you will be able to propagate your plants left-back! Remember to be patient (roots don't form overnight) and have fun with it, after all it's an experiment, so take it as such. So, scissors in hand and let's get down to business!
-
Posted in
Péče o pokojovky